100% Real Microsoft Certified: Azure for SAP Workloads Specialty Certification Exams Questions & Answers, Accurate & Verified By IT Experts
Instant Download, Free Fast Updates, 99.6% Pass Rate.
Planning and Administering Microsoft Azure for SAP Workloads
Includes 282 Questions & Answers
€69.99
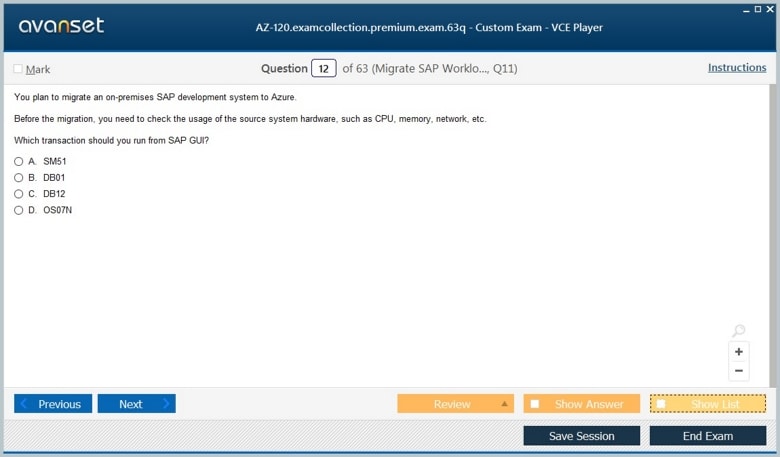
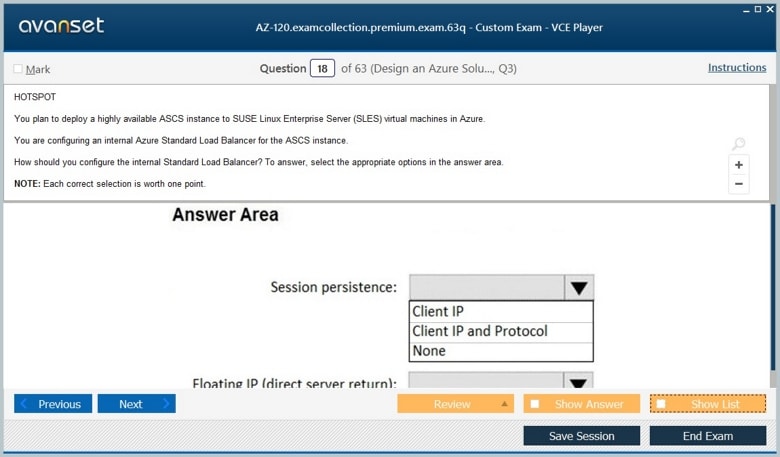
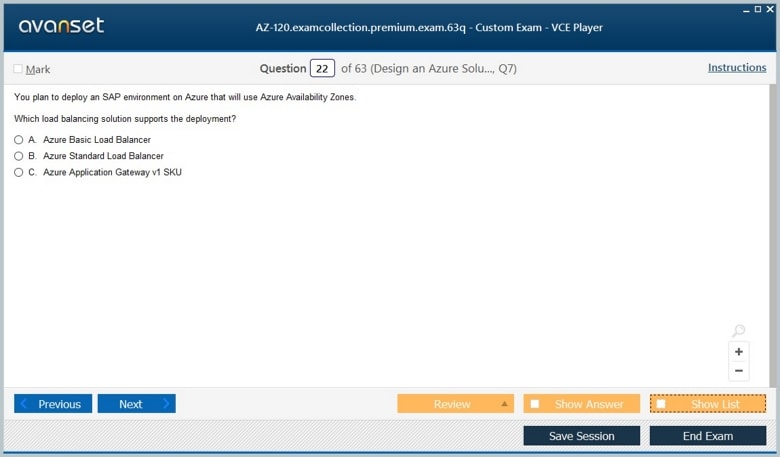
Microsoft Certified: Azure for SAP Workloads Specialty Certification Exams Screenshots
Download Free Microsoft Certified: Azure for SAP Workloads Specialty Practice Test Questions VCE Files
| Exam | Title | Files |
|---|---|---|
Exam AZ-120 |
Title Planning and Administering Microsoft Azure for SAP Workloads |
Files 5 |
Microsoft Certified: Azure for SAP Workloads Specialty Certification Exam Dumps & Practice Test Questions
Prepare with top-notch Microsoft Certified: Azure for SAP Workloads Specialty certification practice test questions and answers, vce exam dumps, study guide, video training course from ExamCollection. All Microsoft Certified: Azure for SAP Workloads Specialty certification exam dumps & practice test questions and answers are uploaded by users who have passed the exam themselves and formatted them into vce file format.
Welcome back. We will now continue with another demo. In this one I will show you how to provision and configure Azure load balancers in order to be able to accommodate the clustered installation of SAP Hana, we will be provisioning two load balancers, and we will be using the VMs, meaning the two VMs that we created, as the backend pool for one of the load balancers. One thing you need to remember is that because we're going to be using a load balancer, we need to disassociate and remove those public IPS that we created for each of the VMs. So now if we go to the web portal on the networking tile, click on network interface and IP configurations, and then IP configuration one, you can see the public IP address settings, and you are able to click on this associate and make sure that the VM IP address is set to static, and of course let's do the same thing for VM one. Let's look for VM one and run through the same steps. So, inside the VM, go to networkingBlade network interface, then IP configurations in blade IPconfig, disassociate, and then onstatic for the internal IP assignment. After the disassociation process is complete, we can go ahead and delete those public IP resources in the portal, find the public IPS, and delete it. The next part is to create the load balancer. The first thing we'll do is that we're going to goto the marketplace and we can search for load balancer. Click on Create and make sure to place it under the same resource group, give it a name (in our case, West Europe), and make sure you select Type as Internal and Skew as Standard. This is very important because picking a standard load balancer will make its zone redundant as well. When it comes to availability zones under the virtual network, select the available VNet and we will assign it a static IP address, which is 192. We can now just review, and I think it looks great. Let's wait until the load balancer is actually provisioned, and then we will create the rules and the backend clicks on the load balancer resource that you've just created, and the first thing we're going to do is configure the backend pool create back end pool and we will callit AZ 12001 eight LB zero backend pool we willassign it by nick using IPV four. It's a virtual machine. So we'll add the two virtual machines that we created earlier, click on them, and add them. This will create the back end pool with these two VMs The next thing we will do is add the health probe, AZ12001, eight LBH probes. We'll be using the TCP protocol, and the port we're going to be using is 62500. We leave it at a 5-second interval with two as the unhealthy threshold; click on that, and we'll now have to add a load balancing rule in our case. I'm going to be calling it the AZ 12001 A LB-Zero LB rule. All IP versions will set it to IBV. Four frontend IPs are already created. You need to make sure HAP ports are enabled. This is what enables load balancing on both TCP and UDP protocols for the back-end pool. We have already created it, and the same is true for the health probe. We will leave the session with no persistence to none.idle timeout for four minutes, and TCP resets disabled floating IP, which needs to be enabled. Now that we've provisioned the first load balancer, which is basically for inbound traffic, we will provision the second load balancer for outbound traffic using the Azure CLI. So let's start the Azure CLI, and I'll expand it so that you can see the full window. The first thing we'll do is choose our subscription. So I'm just going to scroll through the command history Set the subscription for your AZ account (Visual Studio Enterprise Subscription), and make sure to select the resource group as well. This command also queries the resource group location to set the location and ensures that the output is in TSV format. Next we will create a variable to store the public IP name. I will call it AZ 12001 A LB, or one public IP. Then I'm going to create the public IP resource. AZ Network public IP creates a resource group with the name "resource group name" as well. This queue will be standard, and the location is the location variable, and that's our public IP created.Next, we're going to set the load balancer name, the back end pool, and the front end IP name. We will now actually create the load balancer. So let's issue the command. AZ Network LB creates resource Group resource group name nameof the load balancer as LB name the scheme asstandard back end pool set to LB back end poolname and front end IP name location as location andthe public IP address that we created earlier. Okay, oops, we have a small typo, so let's fix it. Here we go. Great. And now the second load balancer is being created using those variables that we entered using the Azure CLI. I showcase the Azure CLI way because this is just another way of creating your resources. It all worked. The next step is to create our load balancer rule. Create a variable for the rules. Let's name it LB Ruleoutsbound. I'll refer to it as Azet 12001 A LB one rule outbound, and then we'll run Azet network LB outbound rule create with resource group set to resource groupname. the ALB name set to the variable LB name the name for the outbound rule Frontend IP configuration is set to the LBFE IP name protocol with all idle timeouts set to 4 seconds for outbound port 1000, which is the backend address pool name. So it will be the LBBE pool name. The rule is now successfully created; Solet should head back to the portal. Let's go to all the resources in our resource group. And we can see the two load balancers here. If we click on Load Balancer and then click on the back end pool, it should be empty, and we can add the two VMs to it. Select the virtual network first. Then you can add both VMs. and you can finish by clicking Save. And this concludes the demo.
Welcome back. Our next task will be to create a jump box, as both of the VMs have now lost the public IP as part of the previous part of this demo. This means that we can't access them via the Internet anymore. So we will create a jump box that has a public IP, and we can then remote to those VMs. This demo continues the previous demo. Let's go back to the resource group and go into the marketplace. Click on Compute and create a virtual machine. We'll give it a name. Again, please remember to continue to follow your own naming convention, which in our case is West Europe. We don't need any infrastructure redundancy, and we will go for Windows Server DataCenter, and I don't need a hotspot. In addition, I will reduce the size to DS 1 V 2. Again, let's set both the username and the password for public access. This is where we select port number 3389. We don't need to worry about licensing. in this particular case. Let's change the disc type to standard SSD. We don't need it to be highly performant for networking. We'll put it on the same network and subnet as the rest of the VMs. Of course, in normal circumstances, you will create a different subnet where your publicly accessible VMs will reside so that you can secure them with NSGs and other policies. We need a public IP, and I'm going to allow RDP3389, and we're setting the network security group to Basic. We don't need accelerated networking, and it's greyed out for this VM anyway. If you're wondering why, it's because it doesn't meet the criteria for accelerated networking. We don't need to place this VM behind the load balancer with boot diagnostics disabled. and OS guest diagnostics are off. We don't need any of that in advance. We will leave everything as is. Let's now create the VM. Now that I've logged in to the jump box, the first thing to do is to download the SSH putty tool. We need to turn off enhanced security under the administrator to allow us to download. So now we've got the tool installed. What we're going to do is use Putty to remote into both of the VMs. It's going to be an SSH to 192.168.4 for the first VM. Accept, enter username and password, and we are in. Now if we try to SSH to the other VM as well, we can open up a new session. It looks like I'm committing a series of human errors while typing the password, but we are finally in yping the As confirmed, we've got access to both of the machines from here, and this concludes this demo. But let's take some time to consolidate the knowledge gains so far in all of the demos before we wrap everything up. We have created two Linux virtual machines in a high-availability context. So we put them in an availability set and within proximity groups to make sure that they are both within close proximity. We've created load balancers to make sure that we can manage the inbound traffic and the outbound traffic to and from these VMs. The final thing we did was create a jumpbox to make sure that we could remotely access these machines internally as they are not publicly accessible anymore. As a final step, you need to remove all these resources that you've created as this actually concludes a sequence of demos that are related to one another.
Welcome back. We're now going to deploy a pair of Azure VMs running Windows Server 2019 in a new availability set. So from your browser in the Azure Portal, click Create a resource. Then create a Windows Server Data Center Azure VM from the new blade that appeared, and initiate the provisioning of a Windows Server 2019 DataCenter Azure VM with the following settings subscription is the name of your subscription for Azure. The Resource Group is the name of a new Resource Group, and I'll use my naming convention again. Please remember to follow yours. again. Let's name it while observing the naming convention that we have. Region the same Azure region where you deployed theAzure VMs in the previous parts of this demo. For availability options, select Availability Set, and for Availability Sets, a brand new Availability Set, which we will again name according to our naming conventions with two false domains and five update domains. Image Windows Server 2019 data centre size. We will go with standard D-4 four SV three.For username, we will use "students" again. Password: Let's use Secure Password and confirm it as well. Public inbound ports allow selected ports selectinbound Ports You can leave RDP 3389 unticked for the WindowsLicense part. OS. This type of premium SSD VirtualNetwork will select "add VNet." This is from the previous part of this demo. Subnet Name will create a brand new subnet, and I will name this one CL 100100:24 subnet address range Let's save it, and we'll go back to the Virtual Machine and make sure that we keep this subnet. Public IP Address. A new IP address will be provisioned. Nic Network Security Group's basic public inbound ports allow selected ports Select inbound ports RDP 3389accelerated Networking is on, and that is correct. And no need to worry about load balancing. Let us go to the management boots. offOS guest diagnostics are also off System-assigned, managed identity off login with AAD credentials off; that's it for this part. So let's move on to the next level. We'll go with the defaults and with the default tags too. Review and create this next step. We won't wait for the provisioning to complete, but we will continue with the next step. We will provision another Windows Server 2019 Data Center Azure VM with the following settings and subscription: the name of your subscription. I will use azat 12001 Bclvm One as the name of the resource group you used when deploying the first Windows Server 2019 Azure VM virtual machine. But do remember your own naming conventions. region is the same Azure region where you deployed the first Windows Server 2019 Data Center Azure VM in this task availability Options availability Sets availability Sets Just pick the one we just created. Windows Server 2019 Data Center Size Standard D-4 SV three usernames and studentagain passwords, and we confirm the password. Public inbound ports allow selected ports Select inbound ports RDP 3389 Licensing It's a non-OSD type PremiumSSD virtual network; we just select the existing VNetsubnet name "CL" subnets, which are the same subnets as for the other VM. Public IP address: create a new public IP address in Network Security Group basic Public inbound ports allow selected ports Select inbound ports RDP 303 a nineaccelerated networking on which is correct no load balancing Solutions for management: disable the monitoring for advanced use of the defaults and for tags too. And we're done now, so let's create it. Click Create again, wait for the provisioning to complete, and this should take a few ick Create agaWe can now move forward and create and configure Azure VM discs in the Azure Portal. Start a PowerShell session in a cloud shell. Please keep in mind that if this is your first time launching Cloud Shell in this Azure subscription, you will be prompted to create an Azure file share to save Cloud Shell files. If so, accept the defaults, which will result in the creation of a storage account in an automatically generated resource group. In the Cloud Shell pane, run the following commands to set the value of the variable Resource Groupname to the name of the resource group containing the resources you provisioned in the previous task. But first we need to make sure that we are connected to our subscription. So we'll first issue a set-up context subscription to the Visual Studio Enterprise subscription in my case. And now we can do "Resource Group name equals AZ12001 b CLRG" as discussed in the Cloud Shell pane. We will run the following command to create the first set of four managed discs that you will attach to the first Azure VM you deployed in the previous task. The next one is disc configuration new azdiskconfiglocation is the location variable disc size is 128 accounttype Premium LRS OS type, and the last one is disc configuration new azdiskconfiglocation is the location variable disc size is 128 accounttype Premium LRS OS type. Windows Make an option called "empty," and then loop through it. This loop will create the discs for VM Zero. In the same Cloud Shell pane, run the following command to create a second set of four managed discs that you will attach to the second AzureVM you deployed in the previous task. We just need to change VM zero to VM one in the previous command back to the Azure Portal. Let's go to our Resource Group where we have the VMs that we just created. From there, navigate to the blade of the first Azure VM you provisioned in the previous task, which is VM zero. From that VM zero blade, navigate to the discs blade and attach data discs with the following settings to VM zero: We will start with LAN zero and then LAN one disc one, line two, disc two, and line three disc three. Let's save it all. You need to also ensure that the caching is set to read-only and then save your changes. Now back at the Azure portal, navigate to the blade of the second Azure VM. You provisioned in the previous task, so that's VM One. From the VM One blade, navigate to the discs blade. And now repeat the previous step to attach the discs with the prefix AZ 12001 BCL VM One data disk. Assign the loan number matching the last character of the disc name. Set host caching to read only. And now you may save your changes. We've now completed this demo. Let's sum up what we've achieved. You've learned how to provision the Azure compute resources necessary to support highly available SAP NetWeaver deployments. And in the next parts of this demo, we will configure the OS to support highly available SAP NetWeaver installations.
Welcome back. We will deploy the Azure Infrastructure compute components required to configure failover clustering on AzureVMs running Windows Server 2019. This will involve deploying a pair of ActiveDirectory domain controllers followed by a pair of Azure VMs running Windows Server 2019 in the same availability set within the same virtual network. To automate the deployment of domain controllers, you will use an Azure Resource Manager Quick Start Template available at the link shown on screen. So from your computer, start a Web browser and navigate to the Azure Portal. If prompted, sign in with the work, school, or personal Microsoft account with the owner or contributor role to the Azure subscription you will be using for this demo. At this point, you should open a new browser tab and navigate to the link we showed previously on screen, and then click on "Deploy to Azure" to initiate its deployment. Then, on the Custom deployment blade, specify the following settings and click Review plus Create is followed by Create to initiate the deployment. Subscription is the name of your Azure subscription. Resource Group is the name of a brand new resource group. I will use my own, but please remember your naming conventions. Location: an Azure region where you can deploy Azure VMs. I would use West Europe. Please keep in mind that you should consider using East US or EastUS as a region for your own resource deployment because you will have better availability for your VM SKUs and cheaper resources. We'll set an admin username and password and the domain name for the DNS prefix. You can use any unique valid DNS prefix for bdcrdp on ports 3389 and 13389. Riffs' location is just the URL we previously showed onscreen, and for artifacts' location, leave the SAS token blank. Please note, the deployment should take about 35 minutes. Wait for the deployment to complete before you proceed to the next part of this demo. Of course, that is if you are actually watching the demo in a hands-on manner.
Welcome back. We're now going to deploy a pair of Azure VMs running Windows Server 2019 in a new availability set. So from your browser in the Azure Portal, click Create a resource. Then create a Windows Server Data Center Azure VM from the new blade that appeared, and initiate the provisioning of a Windows Server 2019 DataCenter Azure VM with the following settings subscription is the name of your subscription for Azure. The Resource Group is the name of a new Resource Group, and I'll use my naming convention again.
Please remember to follow yours. again. Let's name it while observing the naming convention that we have. region is the same Azure region where you deployed the Azure VMs in the previous parts of this demo. For availability options, select Availability Set, and for Availability Sets, a brand new Availability Set, which we will again name according to our naming conventions with two false domains and five update domains. Image Windows Server 2019 data centre size. We will go with standard D-4 four SV three.For username, we will use "students" again. Password: Let's use Secure Password and confirm it as well. Public inbound ports allow selected ports selectinbound Ports You can leave RDP 3389 unticked for the WindowsLicense part. OS. This type of premium SSD VirtualNetwork will select "add VNet." This is from the previous part of this demo. Subnet Name will create a brand new subnet, and I will name this one CL 100100:24 subnet address range let's save it and we go back to theVirtual Machine and make sure that we keep this subnet. public IP address. A new IP address will be provisioned.
Nic Network Security Group's basic public inbound ports allow selected ports Select inbound ports RDP 3389accelerated Networking is on, and that is correct. And no need to worry about load balancing. Let us go to the management boots. offOS guest diagnostics are also off System-assigned, managed identity off login with AAD credentials off; that's it for this part. So let's move on to the next level. We'll go with the defaults and with the default tags too. Review and create this next step. We won't wait for the provisioning to complete, but we will continue with the next step. We will provision another Windows Server 2019 Data Center Azure VM with the following settings and subscription: the name of your subscription. I will use azat 12001 Bclvm One as the name of the resource group you used when deploying the first Windows Server 2019 Azure VM virtual machine. But do remember your own naming conventions. region is the same Azure region where you deployed the first Windows Server 2019 Data Center Azure VM in this task availability Options availability Sets availability Sets Just pick the one we just created. Windows Server 2019 Data Center Size Standard D-4 SV three usernames and studentagain passwords, and we confirm the password. Public inbound ports allow selected ports Select inbound ports RDP 3389 Licensing It's a non-OSD type PremiumSSD virtual network; we just select the existing VNetsubnet name "CL" subnets, which are the same subnets as for the other VM. Public IP address: create a new public IP address in Network Security Group basic Public inbound ports allow selected ports Select inbound ports RDP 303 a nineaccelerated networking on which is correct no load balancing Solutions for management: disable the monitoring for advanced use of the defaults and for tags too.
And we're done now, so let's create it. Click Create again, wait for the provisioning to complete, and this should take a few ck Create agaiWe can now move forward and create and configure Azure VM discs in the Azure Portal. Start a PowerShell session in a cloud shell. Please keep in mind that if this is your first time launching Cloud Shell in this Azure subscription, you will be prompted to create an Azure file share to save Cloud Shell files. If so, accept the defaults, which will result in the creation of a storage account in an automatically generated resource group. In the Cloud Shell pane, run the following commands to set the value of the variable Resource Groupname to the name of the resource group containing the resources you provisioned in the previous task. But first we need to make sure that we are connected to our subscription. So we'll first issue a set-up context subscription to the Visual Studio Enterprise subscription in my case. And now we can do "Resource Group name equals AZ12001 b CLRG" as discussed in the Cloud Shell pane. We will run the following command to create the first set of four managed discs that you will attach to the first Azure VM you deployed in the previous task.
The next one is disc configuration new azdiskconfiglocation is the location variable disc size is 128 accounttype Premium LRS OS type, and the last one is disc configuration new azdiskconfiglocation is the location variable disc size is 128 accounttype Premium LRS OS type. Windows Make an option called "empty," and then loop through it. This loop will create the discs for VM Zero. In the same Cloud Shell pane, run the following command to create a second set of four managed discs that you will attach to the second AzureVM you deployed in the previous task. We just need to change VM zero to VM one in the previous command back to the Azure Portal. Let's go to our Resource Group where we have the VMs that we just created. From there, navigate to the blade of the first Azure VM you provisioned in the previous task, which is VM zero. From that VM zero blade, navigate to the discs blade and attach data discs with the following settings to VM zero: We will start with LAN zero and then LAN one disc one, line two, disc two, and line three disc three. Let's save it all. You need to also ensure that the caching is set to read-only and then save your changes. Now back at the Azure portal, navigate to the blade of the second Azure VM. You provisioned in the previous task, so that's VM One. From the VM One blade, navigate to the discs blade. And now repeat the previous step to attach the discs with the prefix AZ 12001 BCL VM One data disk. Assign the loan number matching thelast character of the disc name. Set host caching to read only. And now you may save your changes. We've now completed this demo. Let's sum up what we've achieved. You've learned how to provision the Azure compute resources necessary to support highly available SAP NetWeaver deployments. And in the next parts of this demo, we will configure the OS to support highly available SAP NetWeaver installations.
ExamCollection provides the complete prep materials in vce files format which include Microsoft Certified: Azure for SAP Workloads Specialty certification exam dumps, practice test questions and answers, video training course and study guide which help the exam candidates to pass the exams quickly. Fast updates to Microsoft Certified: Azure for SAP Workloads Specialty certification exam dumps, practice test questions and accurate answers vce verified by industry experts are taken from the latest pool of questions.
Microsoft Microsoft Certified: Azure for SAP Workloads Specialty Video Courses
Top Microsoft Certification Exams
Site Search:
SPECIAL OFFER: GET 10% OFF
Pass your Exam with ExamCollection's PREMIUM files!
SPECIAL OFFER: GET 10% OFF
Use Discount Code:
MIN10OFF
A confirmation link was sent to your e-mail.
Please check your mailbox for a message from support@examcollection.com and follow the directions.
Download Free Demo of VCE Exam Simulator
Experience Avanset VCE Exam Simulator for yourself.
Simply submit your e-mail address below to get started with our interactive software demo of your free trial.
Add Comment
Feel Free to Post Your Comments About EamCollection VCE Files which Include Microsoft Certified: Azure for SAP Workloads Specialty Certification Exam Dumps, Practice Test Questions & Answers.